Bridge
The StaFi Bridge facilitates token transfers between the supported networks. This guide outlines the process of bridging StaFi's rTokens using the StaFi Bridge.
StaFi Bridge
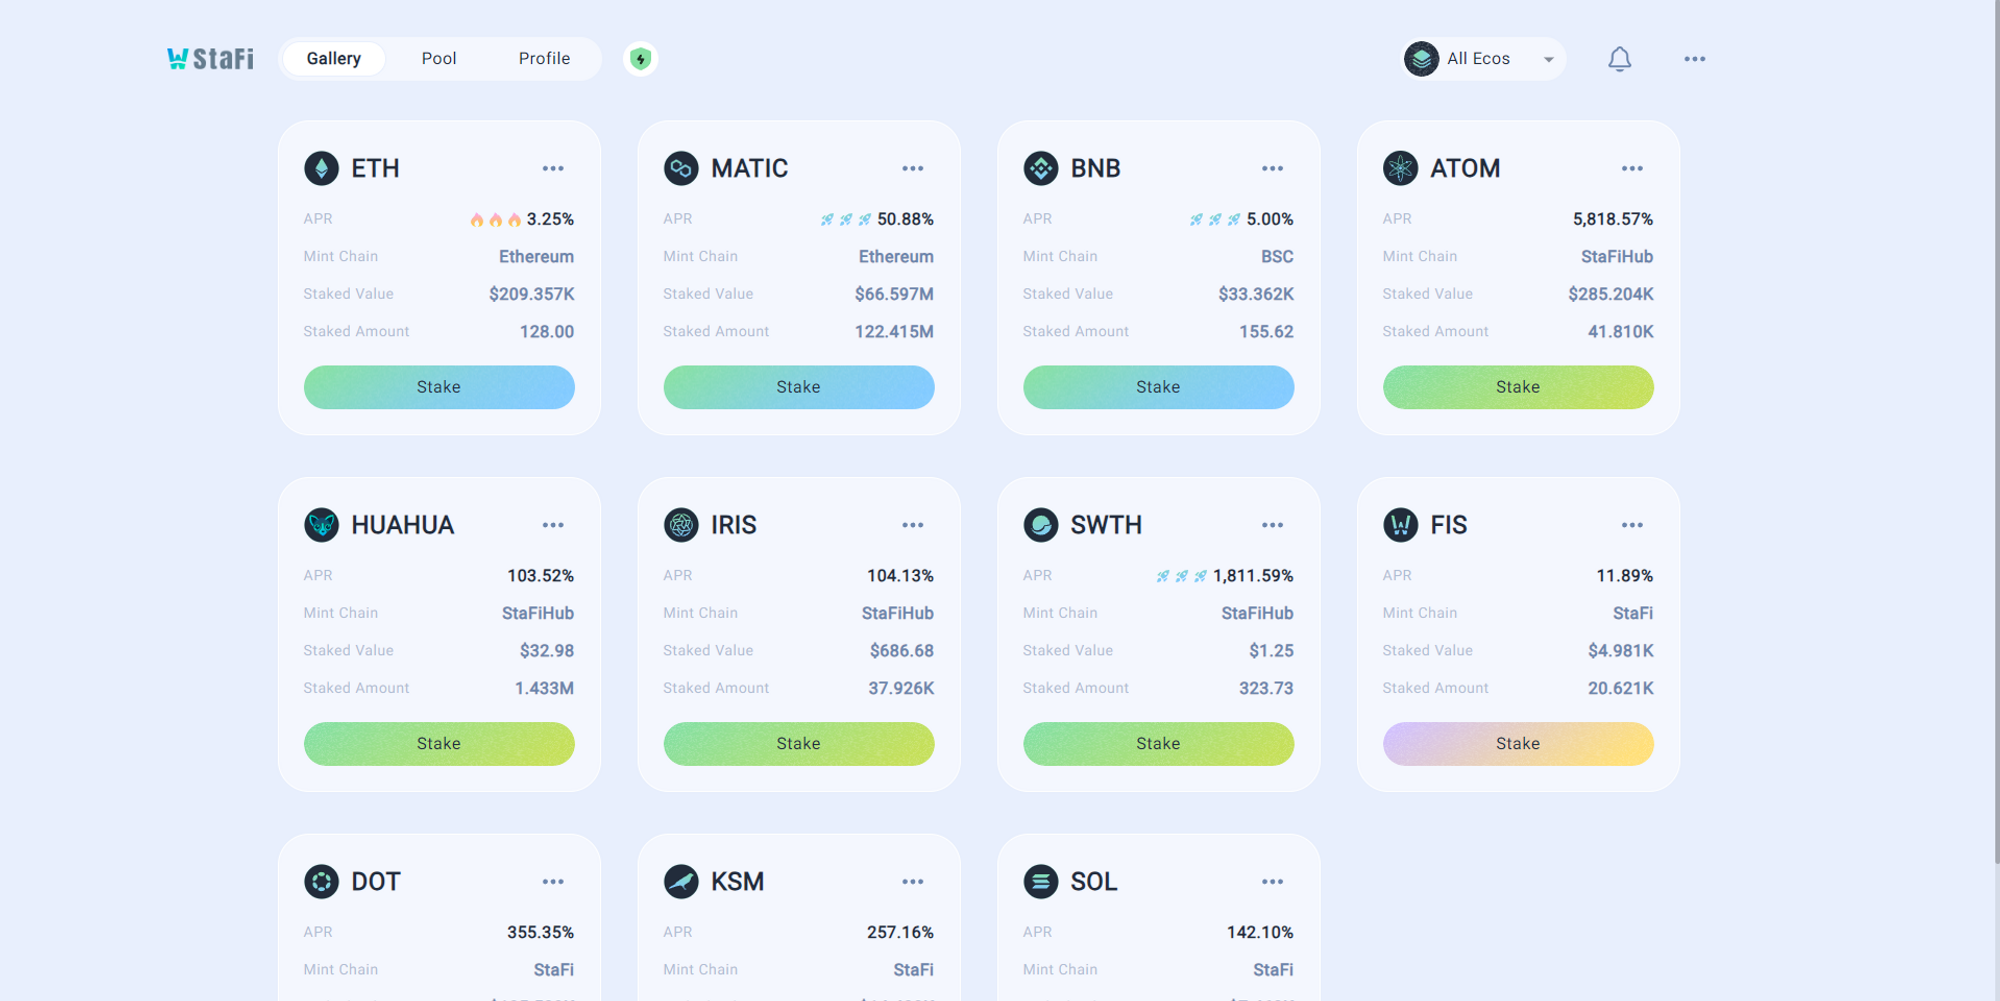
Supported Tokens
- FIS / rFIS: StaFi Chain, StaFi Hub, BSC Chain, Ethereum, Solana, Polygon, Layer2(Arbitrum, Optimism)
- rETH: Ethereum, Layer2(Arbitrum, Optimism)
- rMATIC: Ethereum, Polygon
- rBNB: BSC Chain
- rDOT: StaFi Chain
- ATOM / rATOM: StaFi Hub, Cosmos Hub, IRISnet Hub, Chihuahua
- IRIS / rIRIS: StaFi Hub, Cosmos Hub, IRISnet Hub, Chihuahua
- HUAHUA / rHUAHUA: StaFi Hub, Cosmos Hub, IRISnet Hub, Chihuahua
- rDOT: StaFi Chain
- rKSM: StaFi Chain
- rSOL: StaFi Chain, Solana
Guide
Prerequisites
- Metamask Wallet or Wallet Connect for EVM Ecosystem Tokens
- Keplr Wallet for Cosmos Ecosystem Tokens
- Polkadot.js Extension Wallet for Polkadot Ecosystem Tokens
- Phantom Wallet for the Solana Token
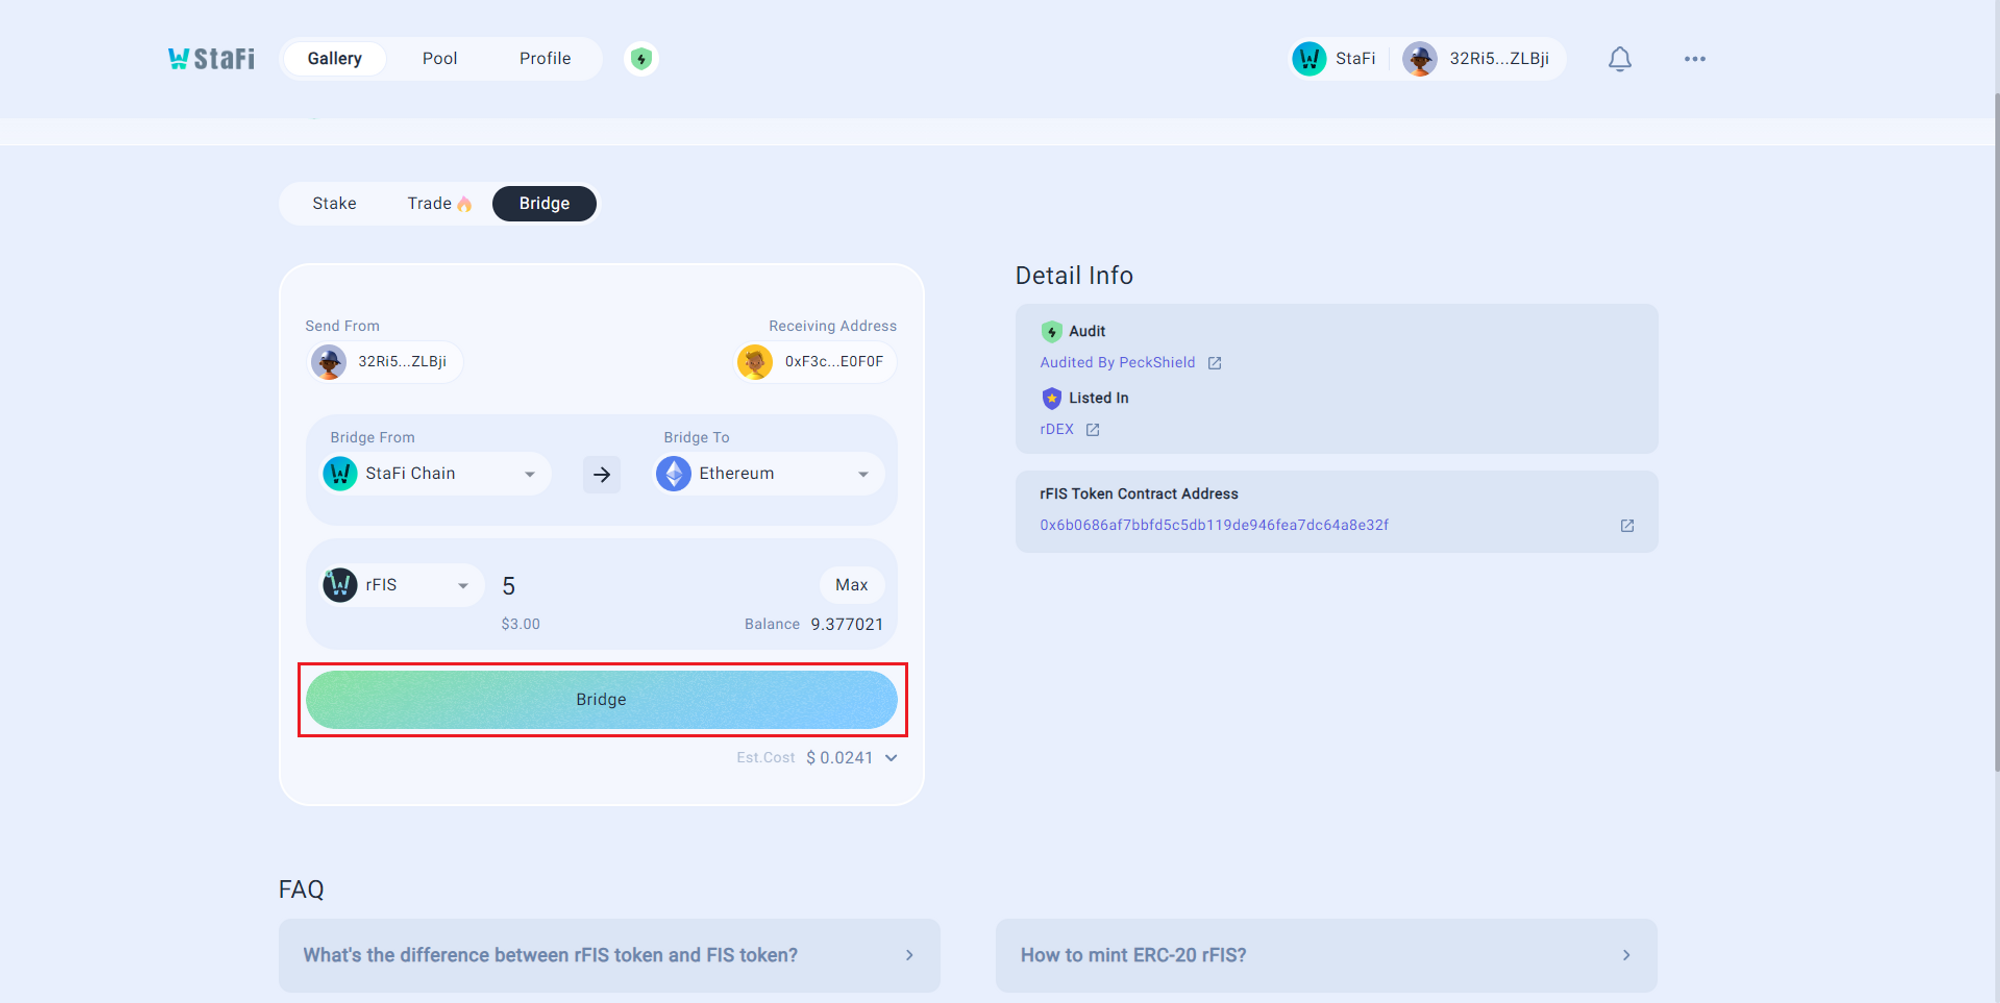
Access the rToken App
Go to StaFi rToken App (opens in a new tab).
Select Token
Choose the preferred token that you would like to bridge.
Select Bridge
Select on the “bridge” tab
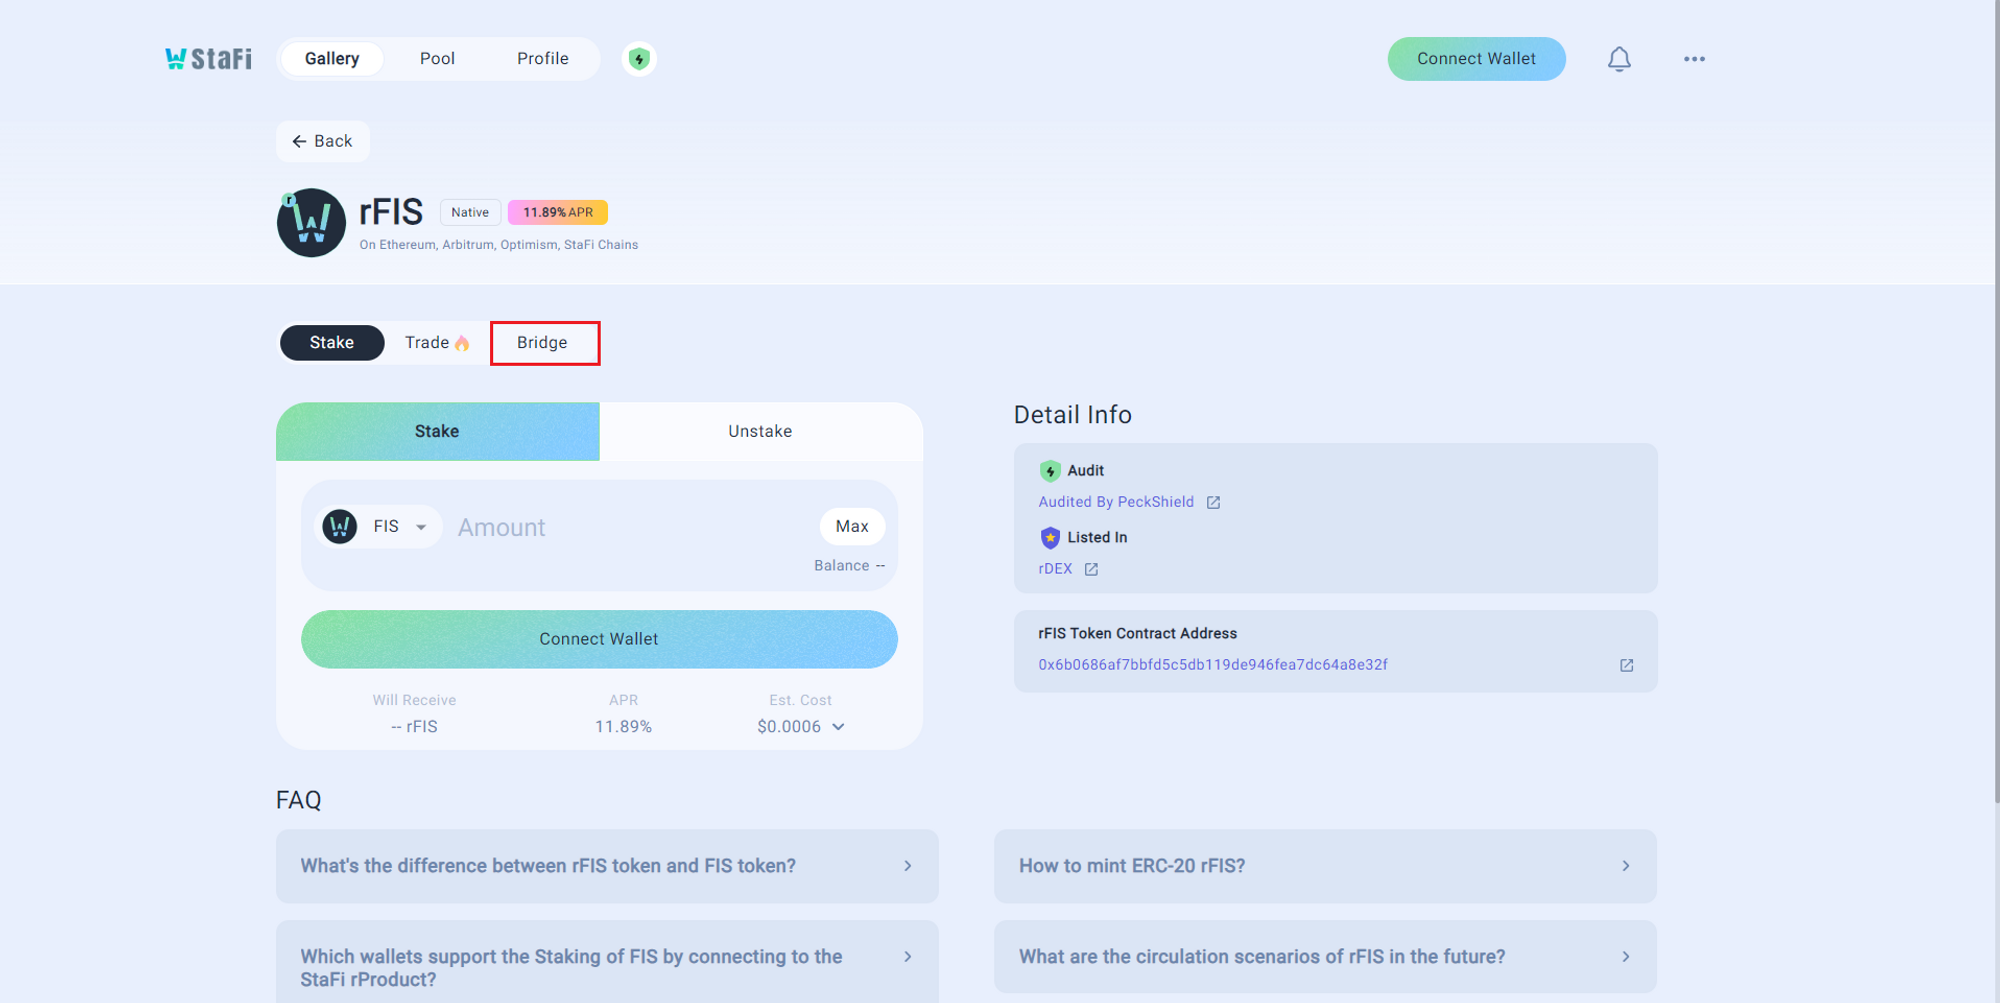
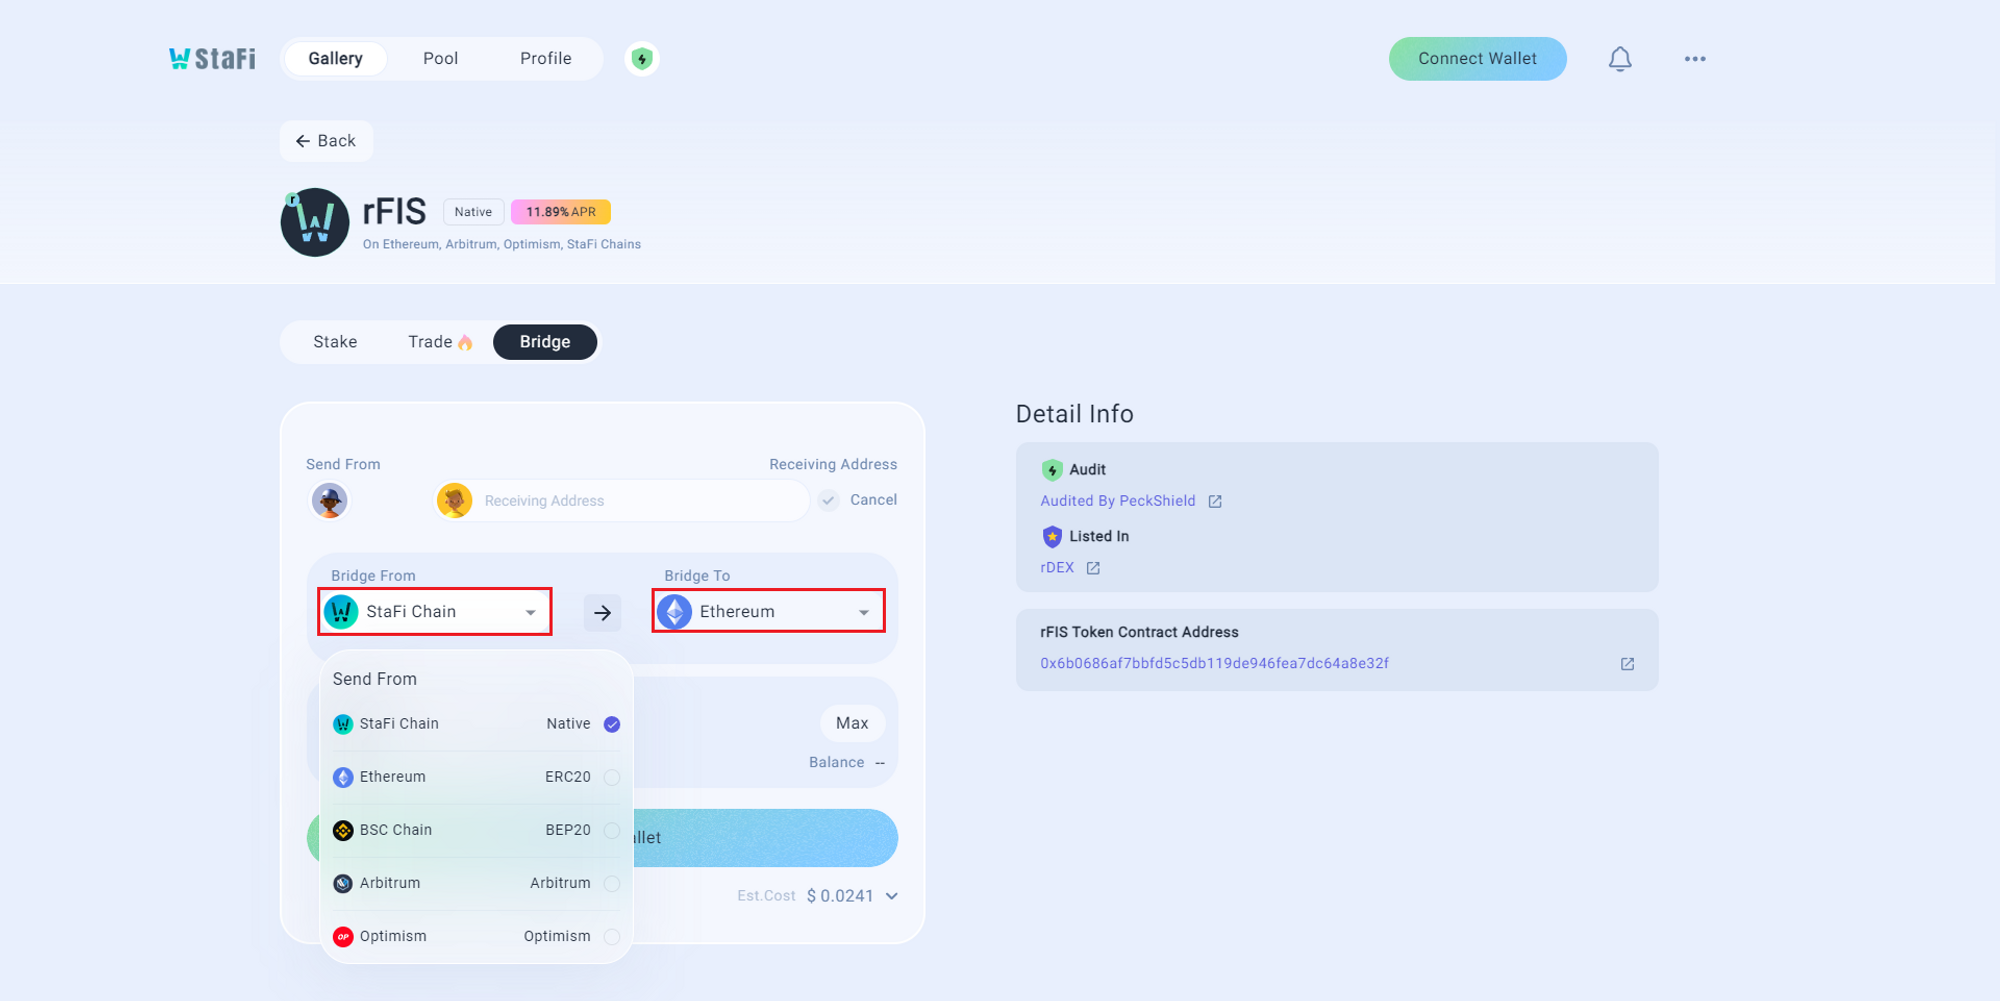
Bridge Routes
Choose the origin and destination for your tokens using the provided dropdown boxes. Ensure you possess sufficient tokens to cover transaction fees.
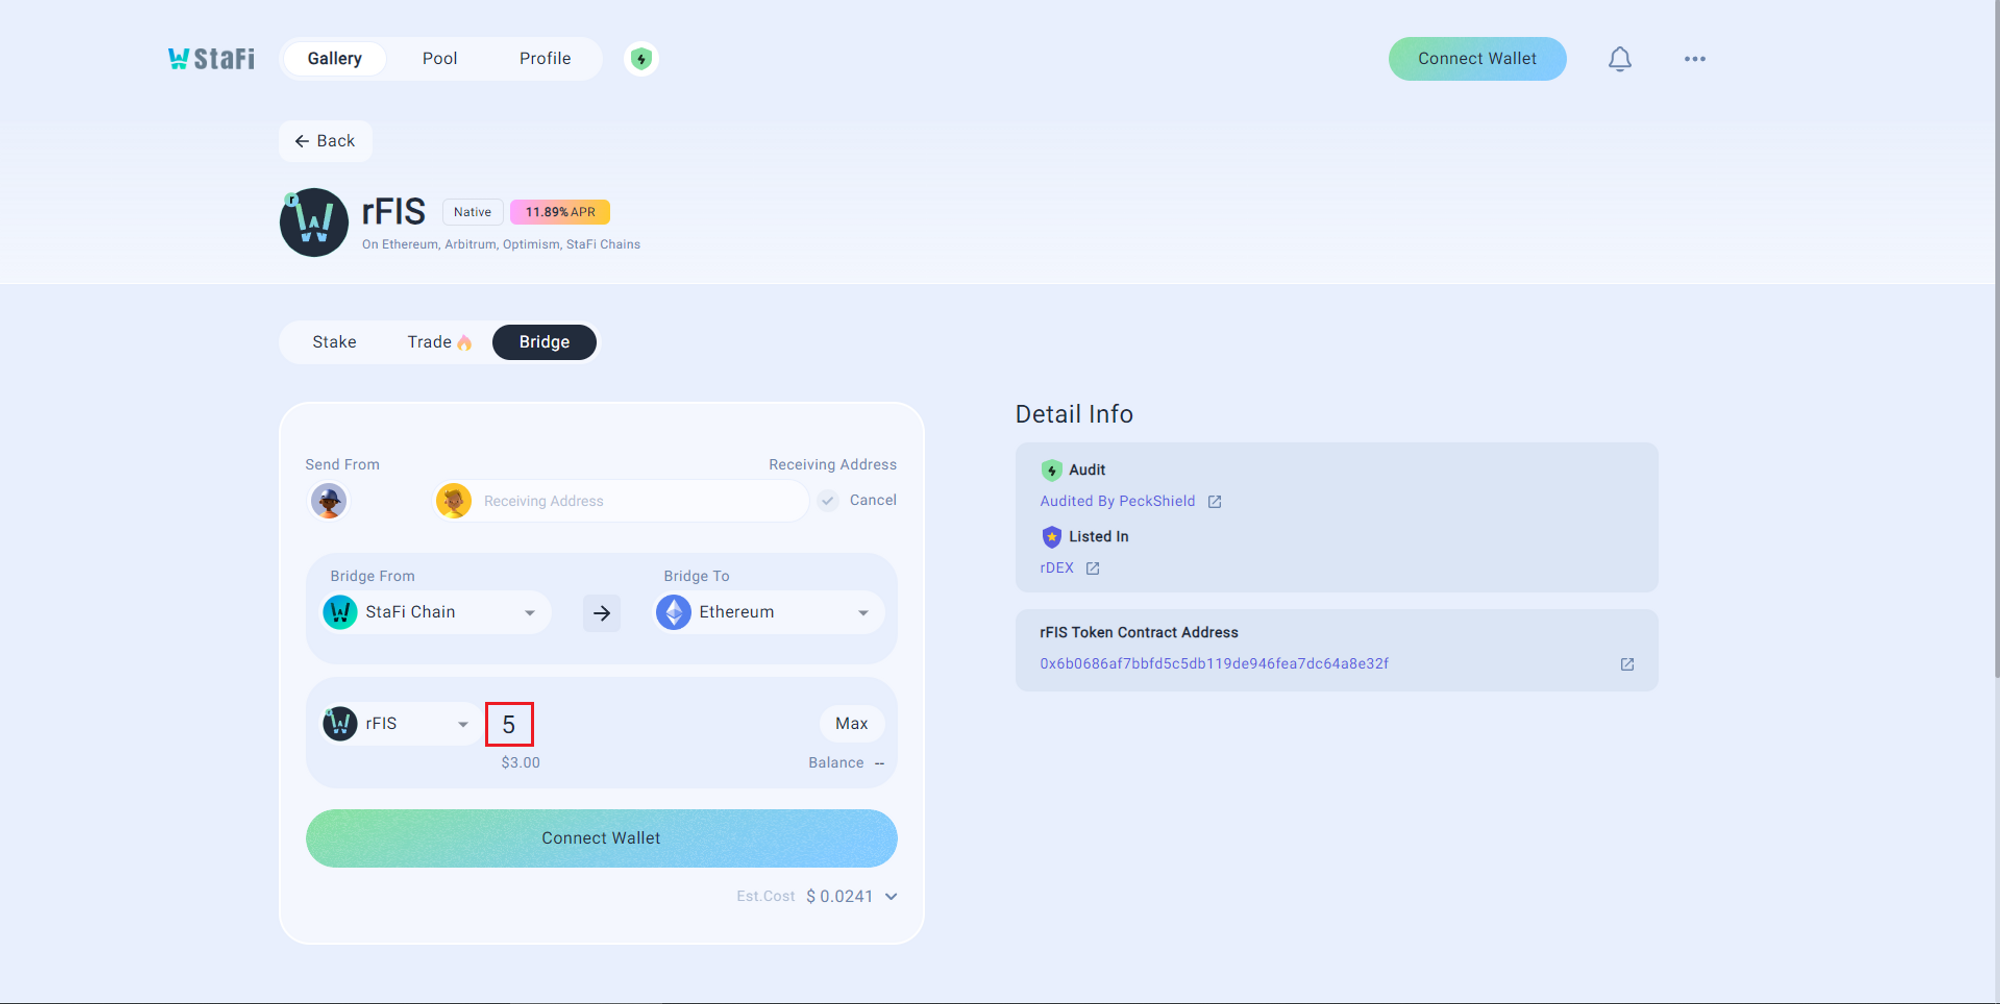
Enter Amount
Enter the amount of tokens you would like to bridge.
Connect Wallet
Click on the “Connect Wallet” button to connect both wallets relevant to your bridge routes. After a successful connection, your Receiving Address will automatically update to match the address of the linked wallet.

Bridge Tokens
Upon clicking “Bridge”, you will be redirected to your connected wallet. Confirm the transaction details, including gas fees. To proceed, click on the "Confirm" button to sign the transaction. Wait for the transaction to be confirmed and the staking operation to be completed successfully.
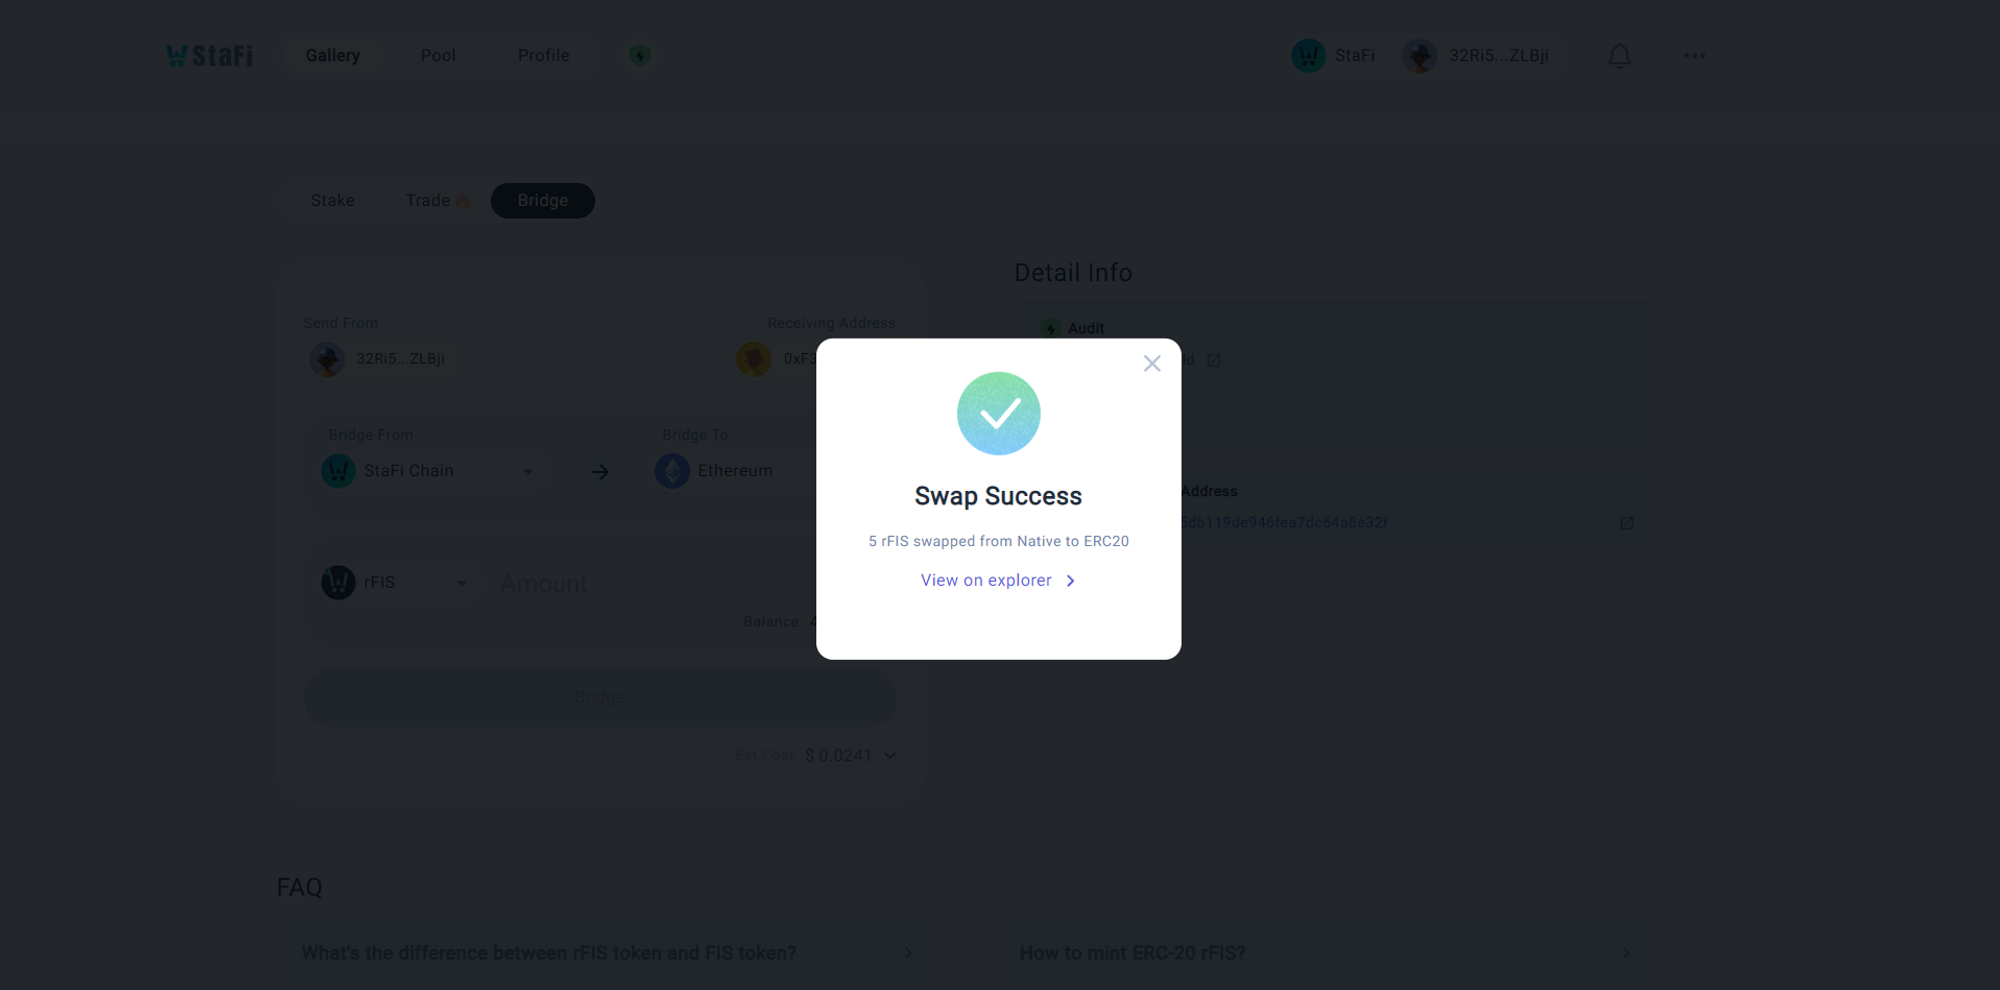
Receive Bridged Tokens
After the successful confirmation of your transaction, a notification will appear, accompanied by a link directing you to the explorer for transaction details. You can then view the bridged tokens in your wallet.
Arbitrum Bridge
The Arbitrum bridge allows for seamless token transfers between the Ethereum mainnet and the Arbitrum Rollup chain. This guide will walk you through the process of bridging FIS and rETH tokens using the Arbitrum bridge.
Connect to Ethereum Mainnet
Ensure your web3 wallet (e.g., MetaMask) is connected to the Ethereum mainnet.
Visit the Arbitrum Bridge Portal
Navigate to the official Arbitrum Bridge (opens in a new tab).
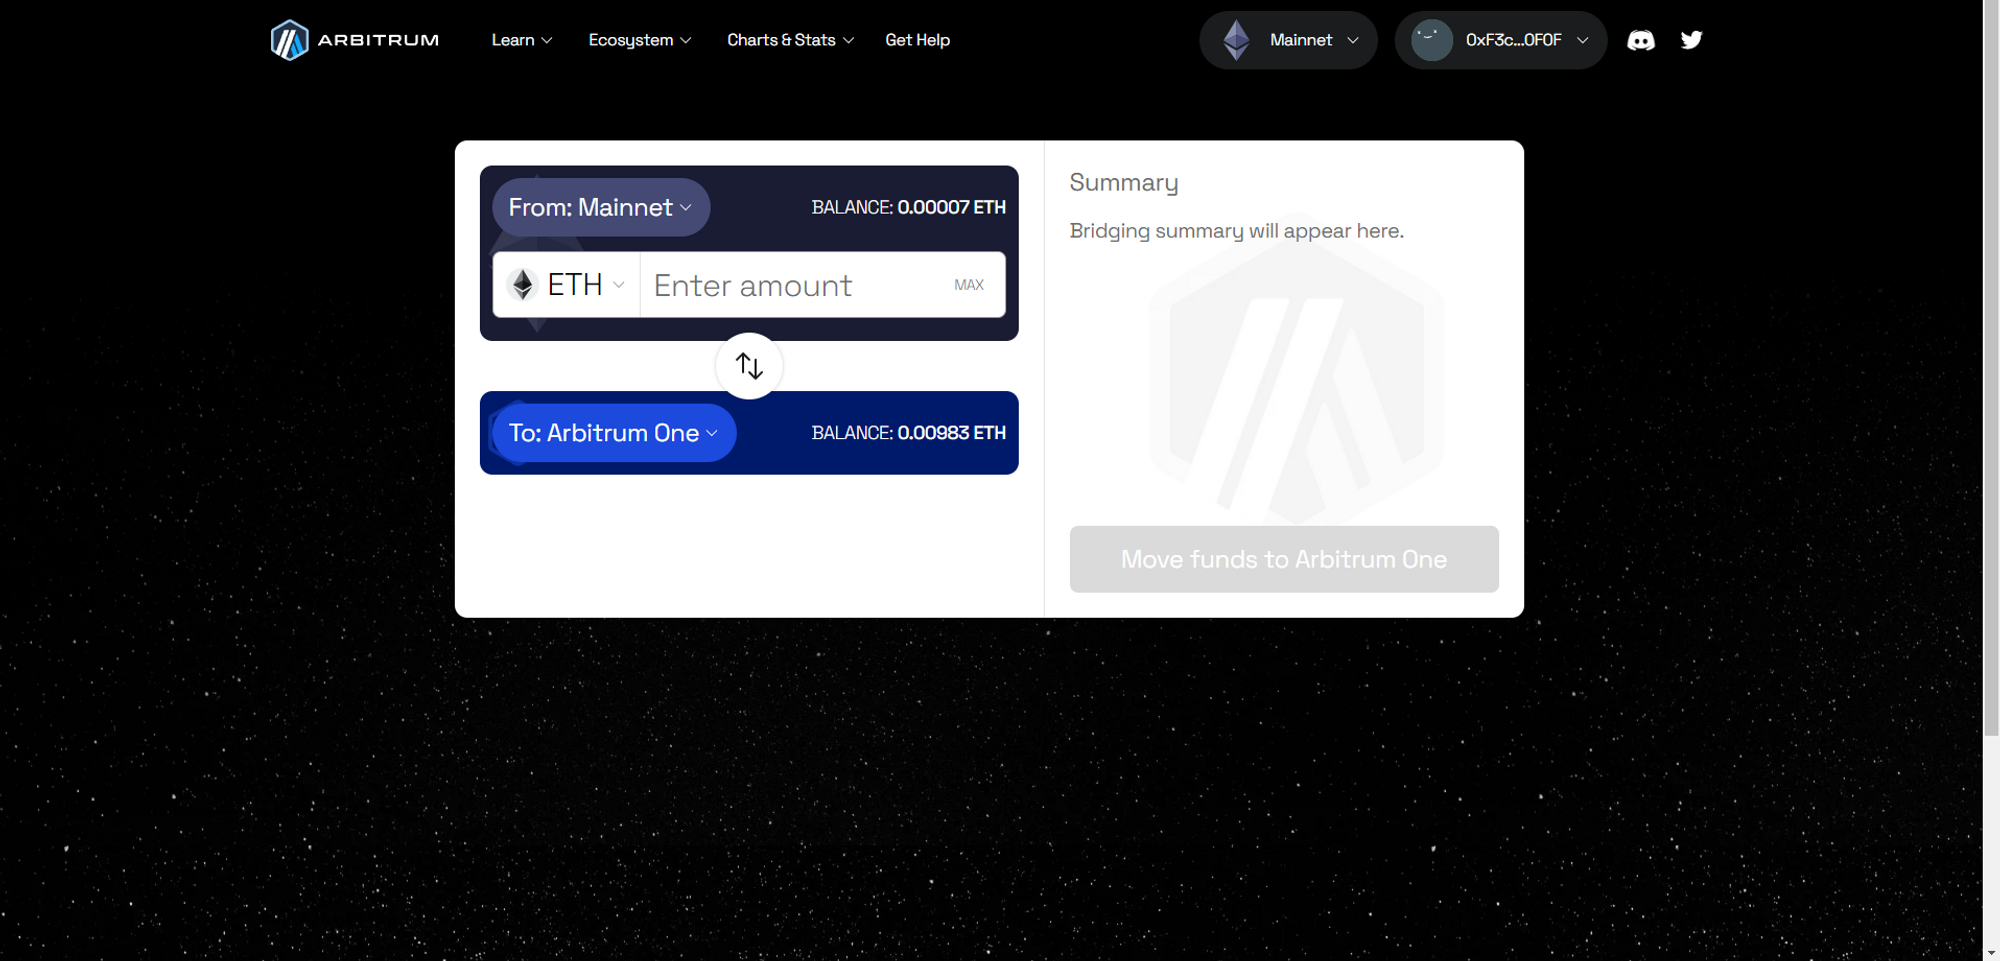
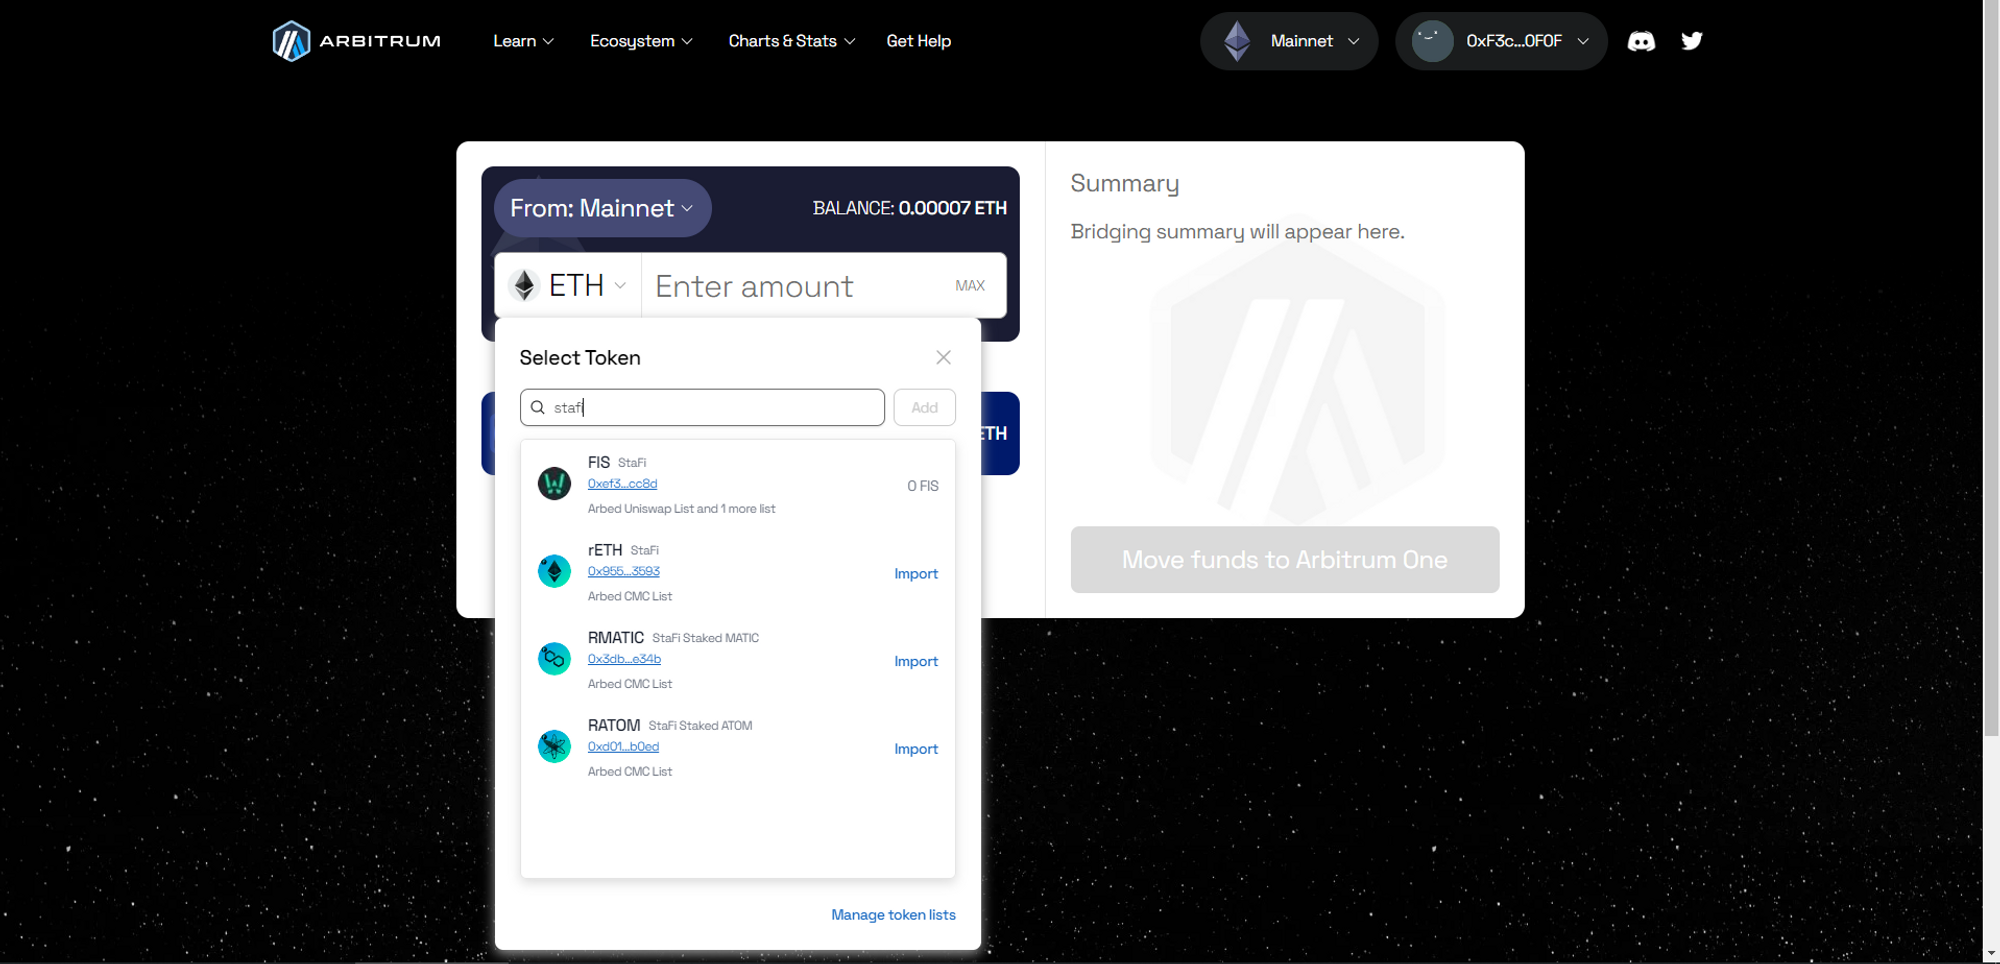
Select Token
Choose your preferred token from the dropdown, depending on which token you want to bridge.
Enter Amount
Specify the amount of the selected token you wish to transfer to the Arbitrum network.

Initiate Transfer
Click "Deposit" to begin the bridging process, which will lock your tokens on Ethereum and mint the equivalent on Arbitrum.
Confirm Transaction
Confirm the transaction in your web3 wallet. Ensure you have enough ETH for gas fees.
Switch to Arbitrum Network
In your web3 wallet, switch to the Arbitrum network to view and use your bridged tokens.
Returning to Ethereum Mainnet
To move tokens back to Ethereum, use the Arbitrum Bridge Portal, select the token, and initiate a withdrawal.
Optimism Bridge
The Optimism bridge allows users to transfer tokens between the Ethereum mainnet and the Optimistic Ethereum (OE) network. This guide will walk you through the process of bridging FIS and rETH tokens using the Optimism bridge.
Connect to Ethereum Mainnet
Ensure your web3 wallet (e.g., MetaMask) is connected to the Ethereum mainnet.
Visit the Arbitrum Bridge Portal
Navigate to the official Optimism Bridge (opens in a new tab).
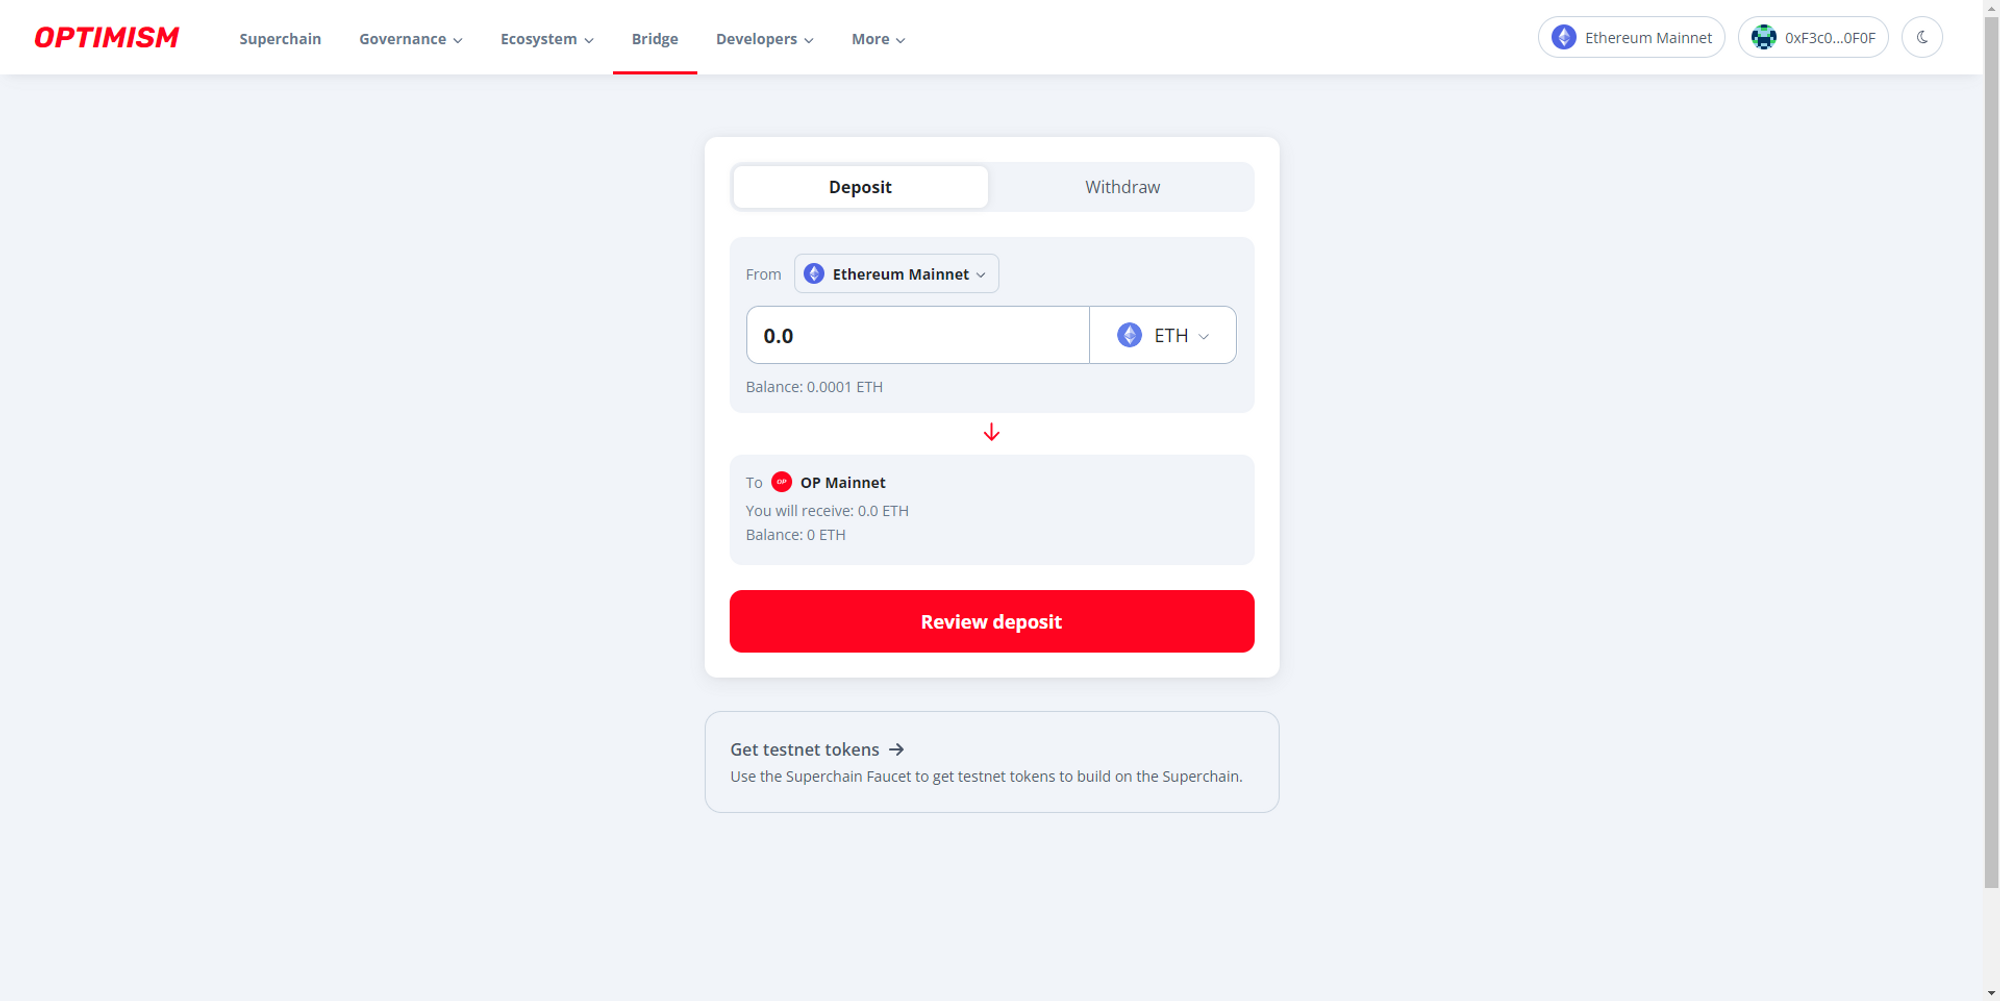
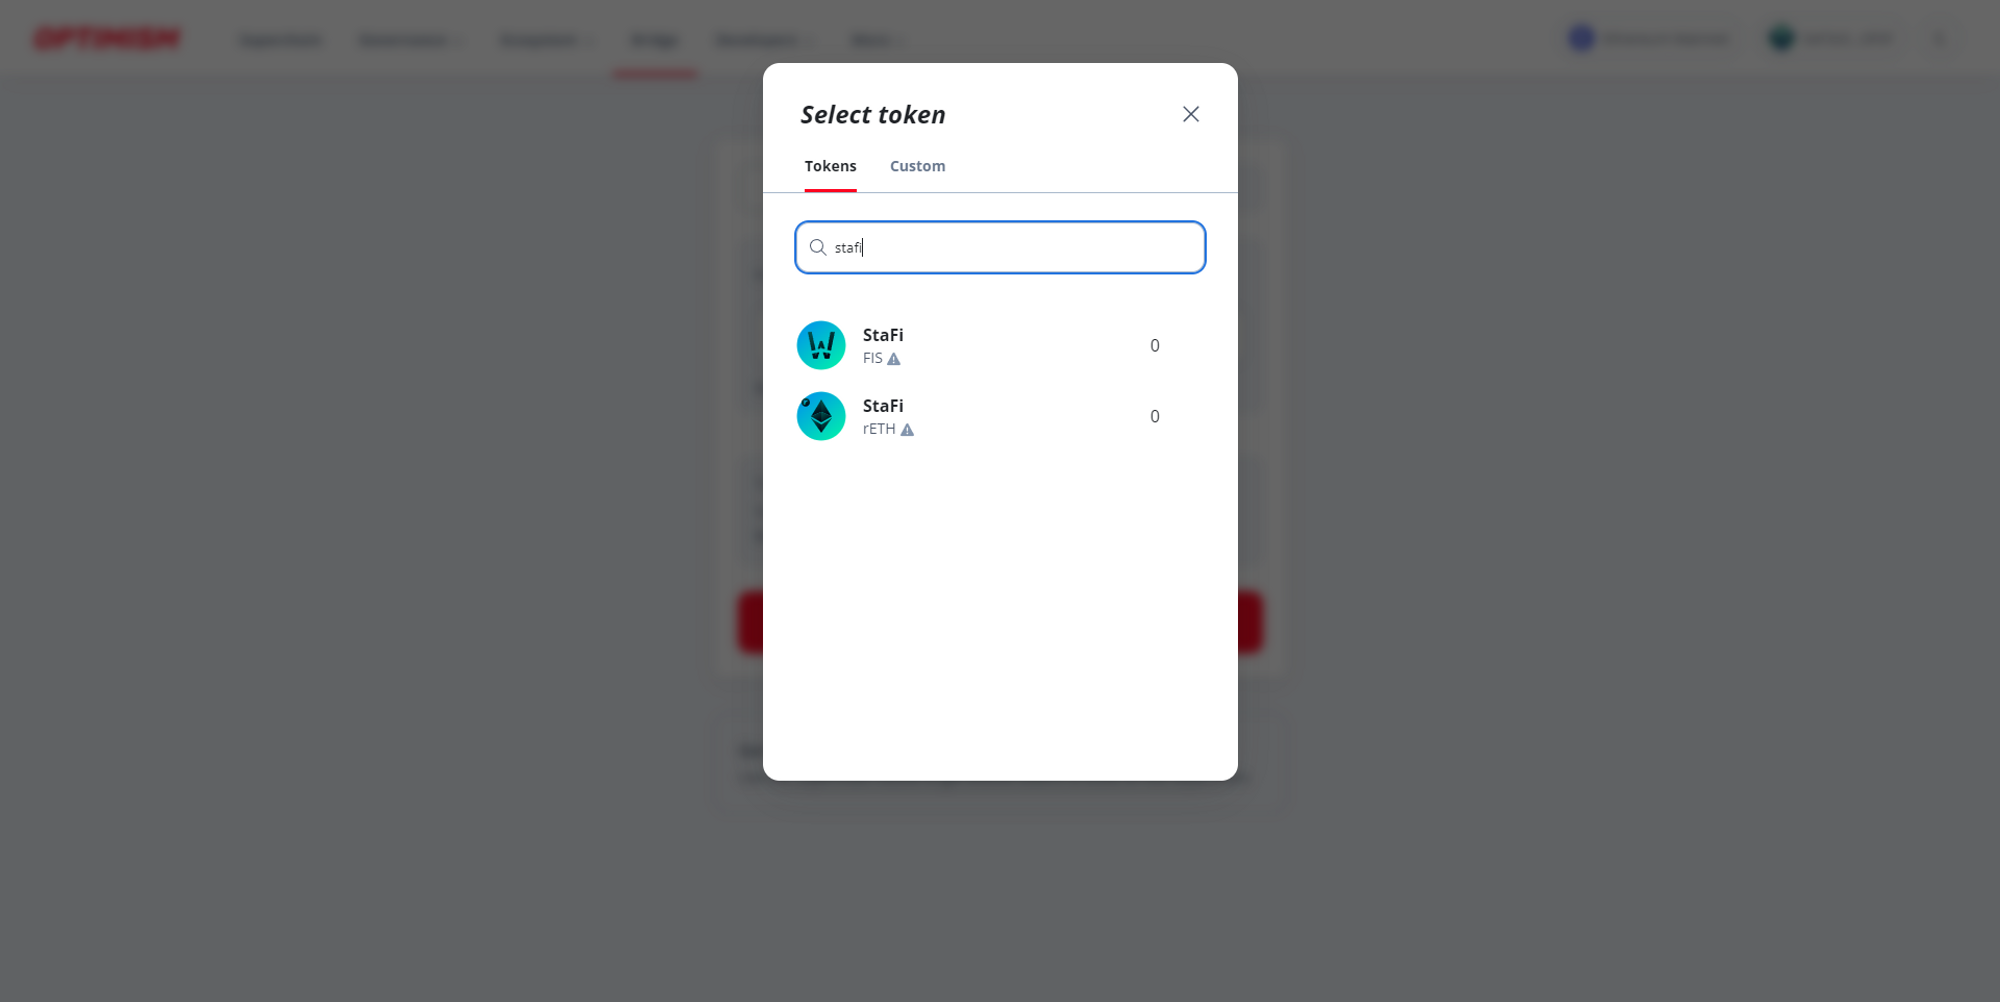
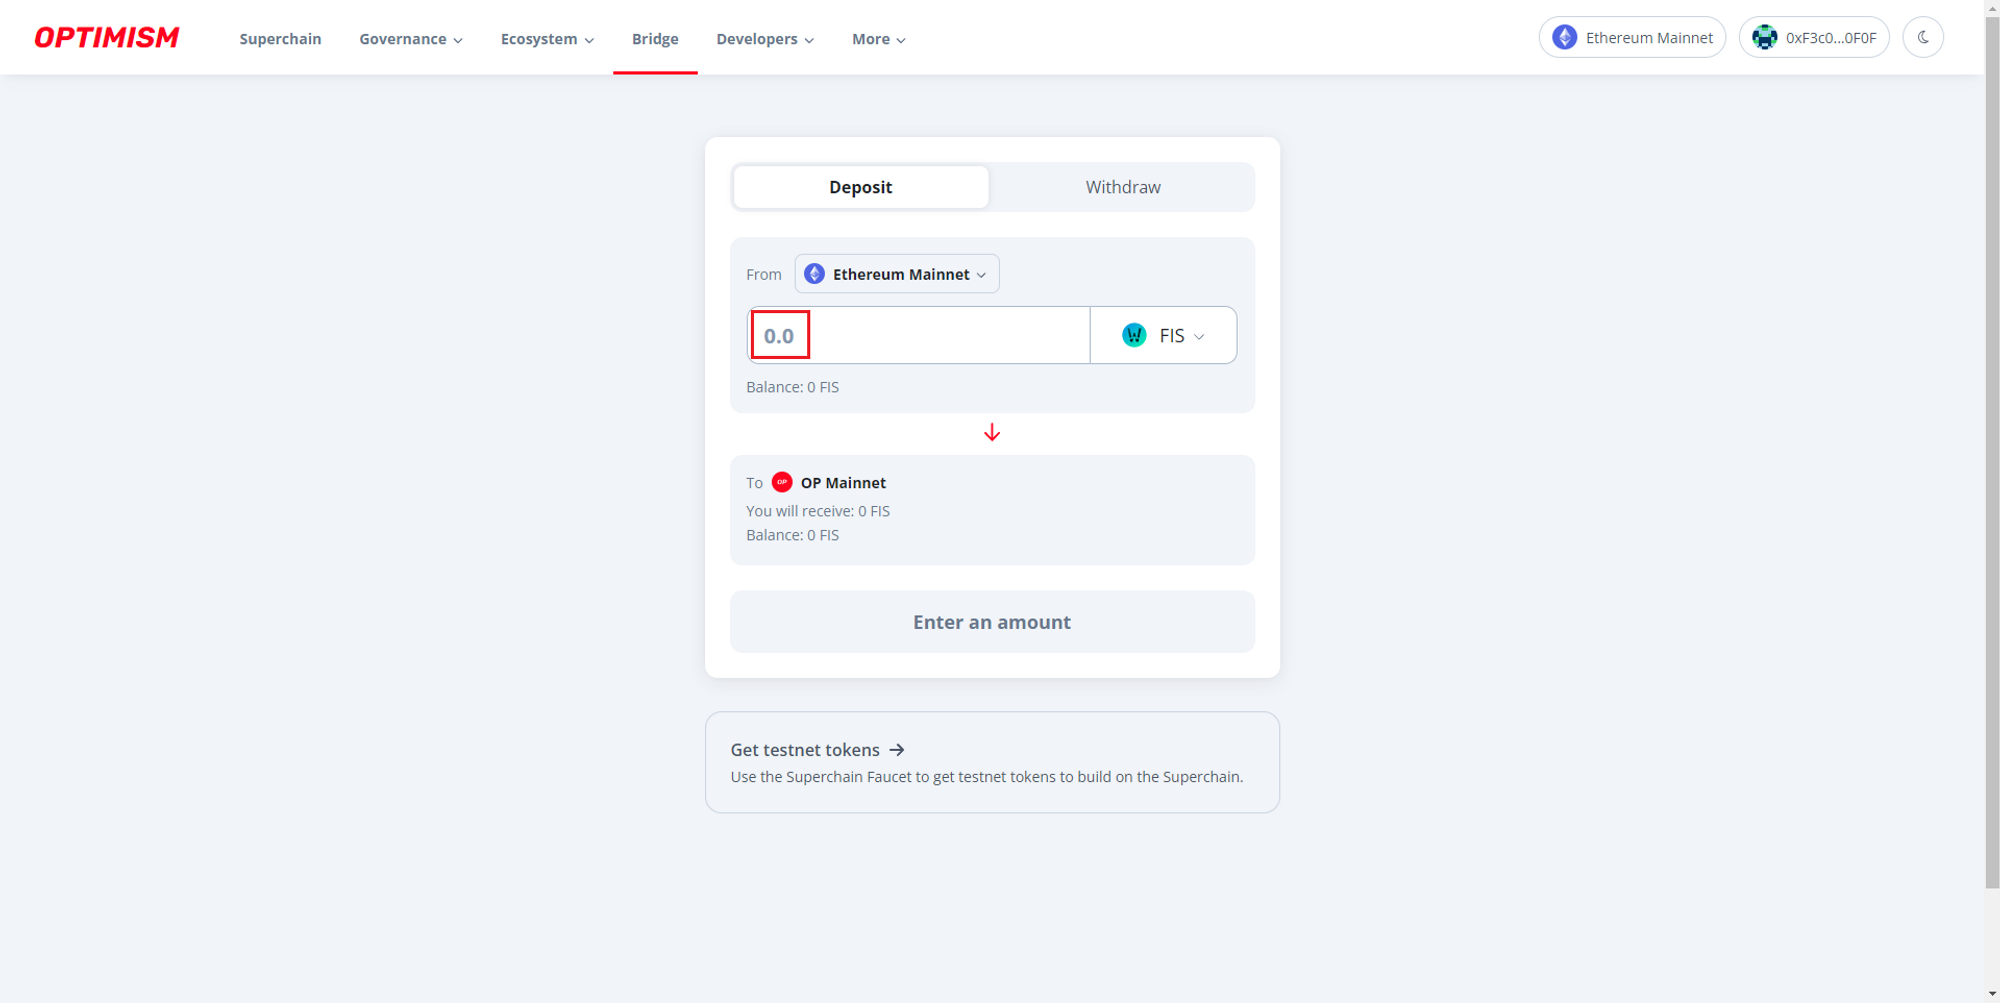
Select Token
From the dropdown menu, select either FIS or rETH, depending on which token you want to bridge.
Enter Amount
Input the amount of FIS or rETH you wish to transfer to the Optimistic Ethereum network.
Initiate Transfer
Click on the "Deposit" or "Transfer" button. This will initiate the process of locking your tokens on the Ethereum mainnet and minting the equivalent amount on the OP network.
Confirm Transaction
Confirm the transaction in your web3 wallet. Ensure you have enough ETH for gas fees.
Wait for Completion
The bridging process might take some time. Once completed, you'll receive the equivalent amount of FIS or rETH on the Optimistic Ethereum network.
Switch to Optimistic Ethereum Network
In your web3 wallet, switch to the Optimistic Ethereum network to view and use your bridged FIS or rETH tokens.
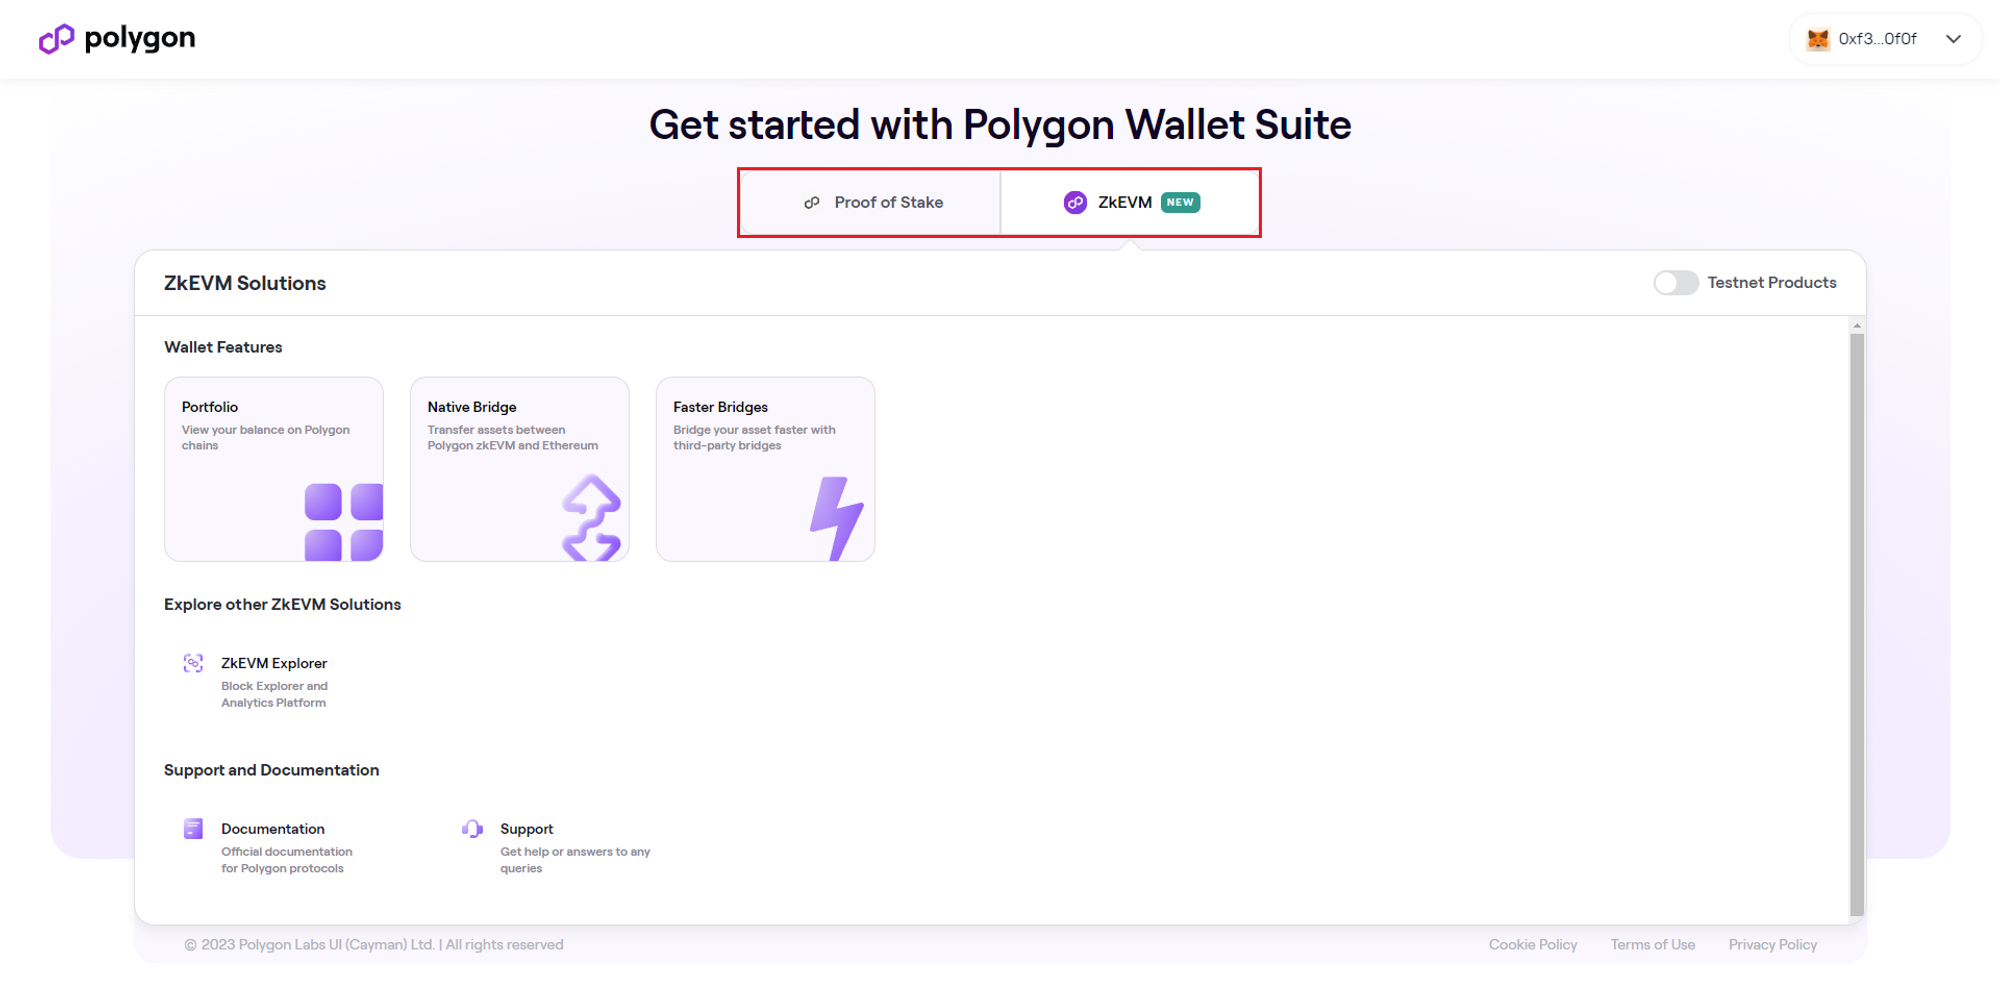
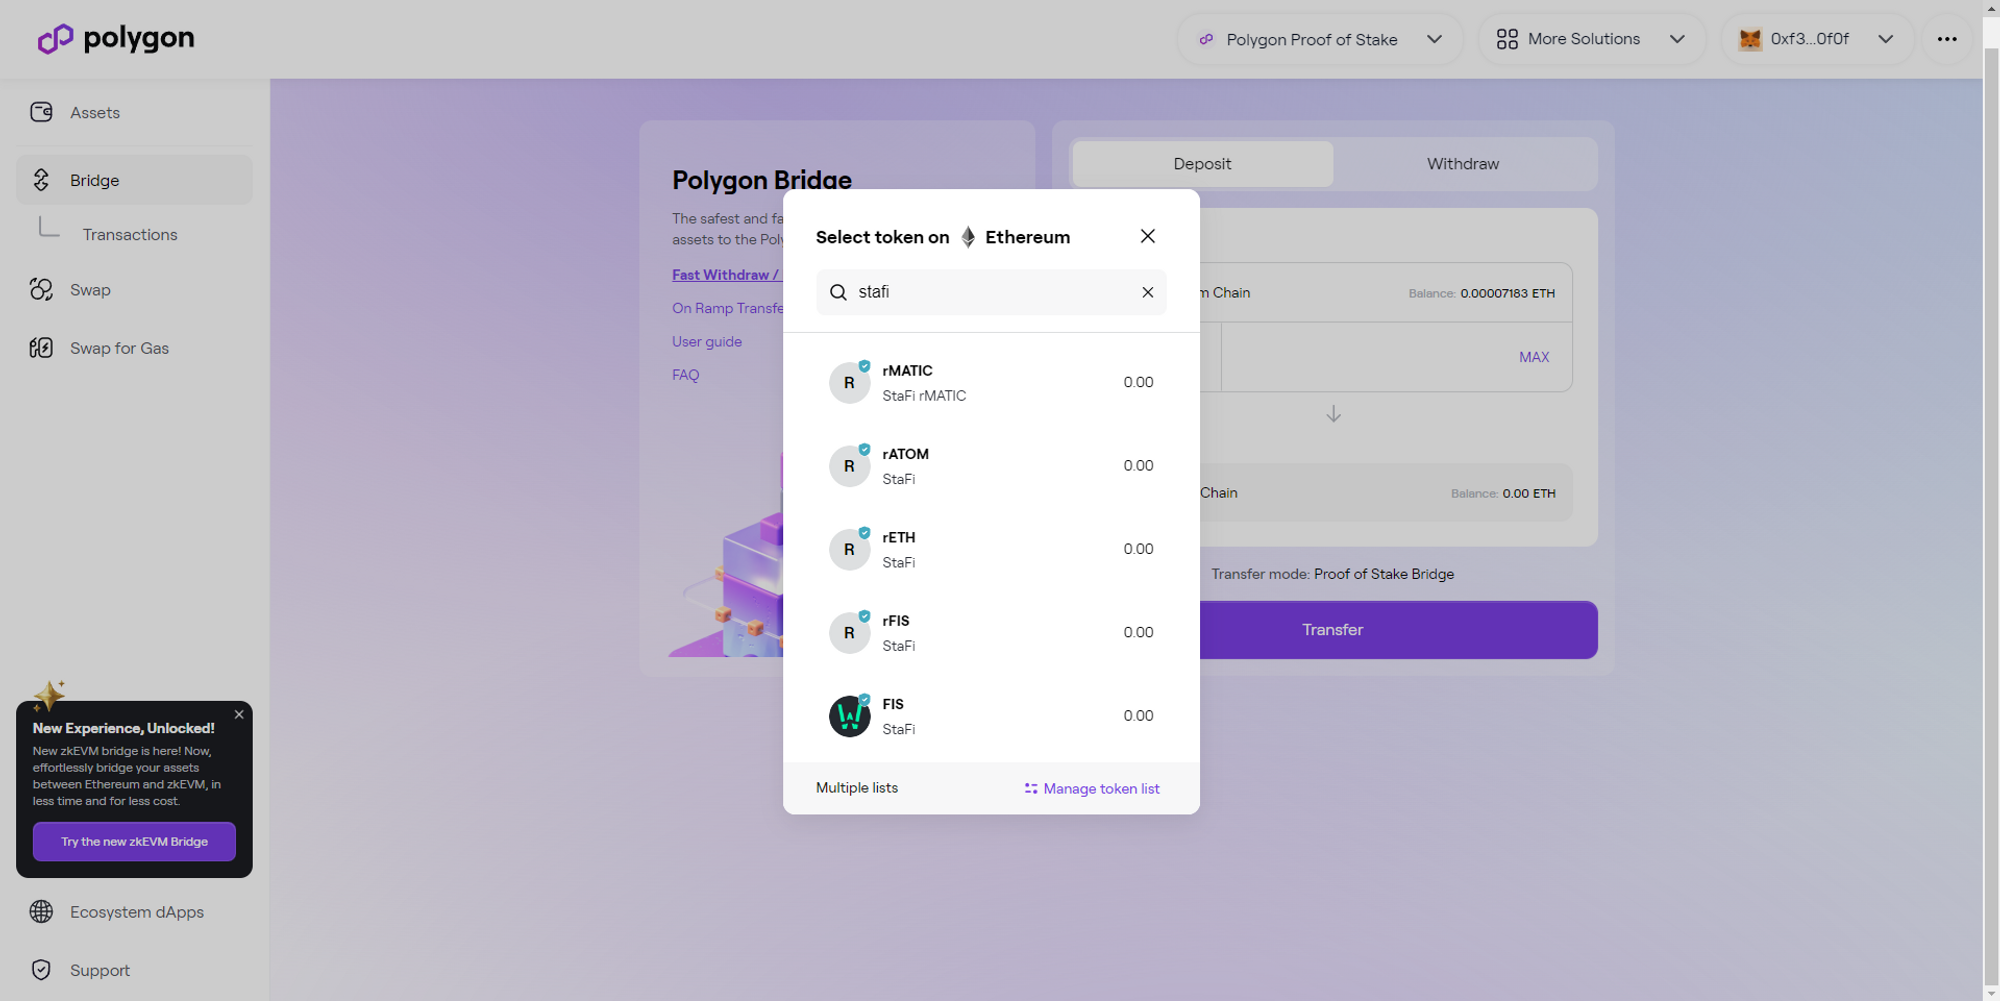
Polygon / Polygon zkEVM Bridge
The Polygon bridge facilitates token transfers between the Ethereum mainnet and the Polygon (Matic) network. This guide outlines the process of bridging FIS, rFIS, and rETH tokens using the Polygon bridge.
Connect to Ethereum Mainnet
Ensure your web3 wallet (e.g., MetaMask) is connected to the Ethereum mainnet.
Visit the Polygon Wallet
Navigate to the official Polygon Wallet (opens in a new tab).
Select Chain
Select to bridge either to Polygon or Polygon ZkEVM from the tabs shown.
Select Token
Choose your preferred token, depending on which token you want to bridge.
Enter Amount
Specify the amount of the selected token you wish to transfer to the Polygon network.
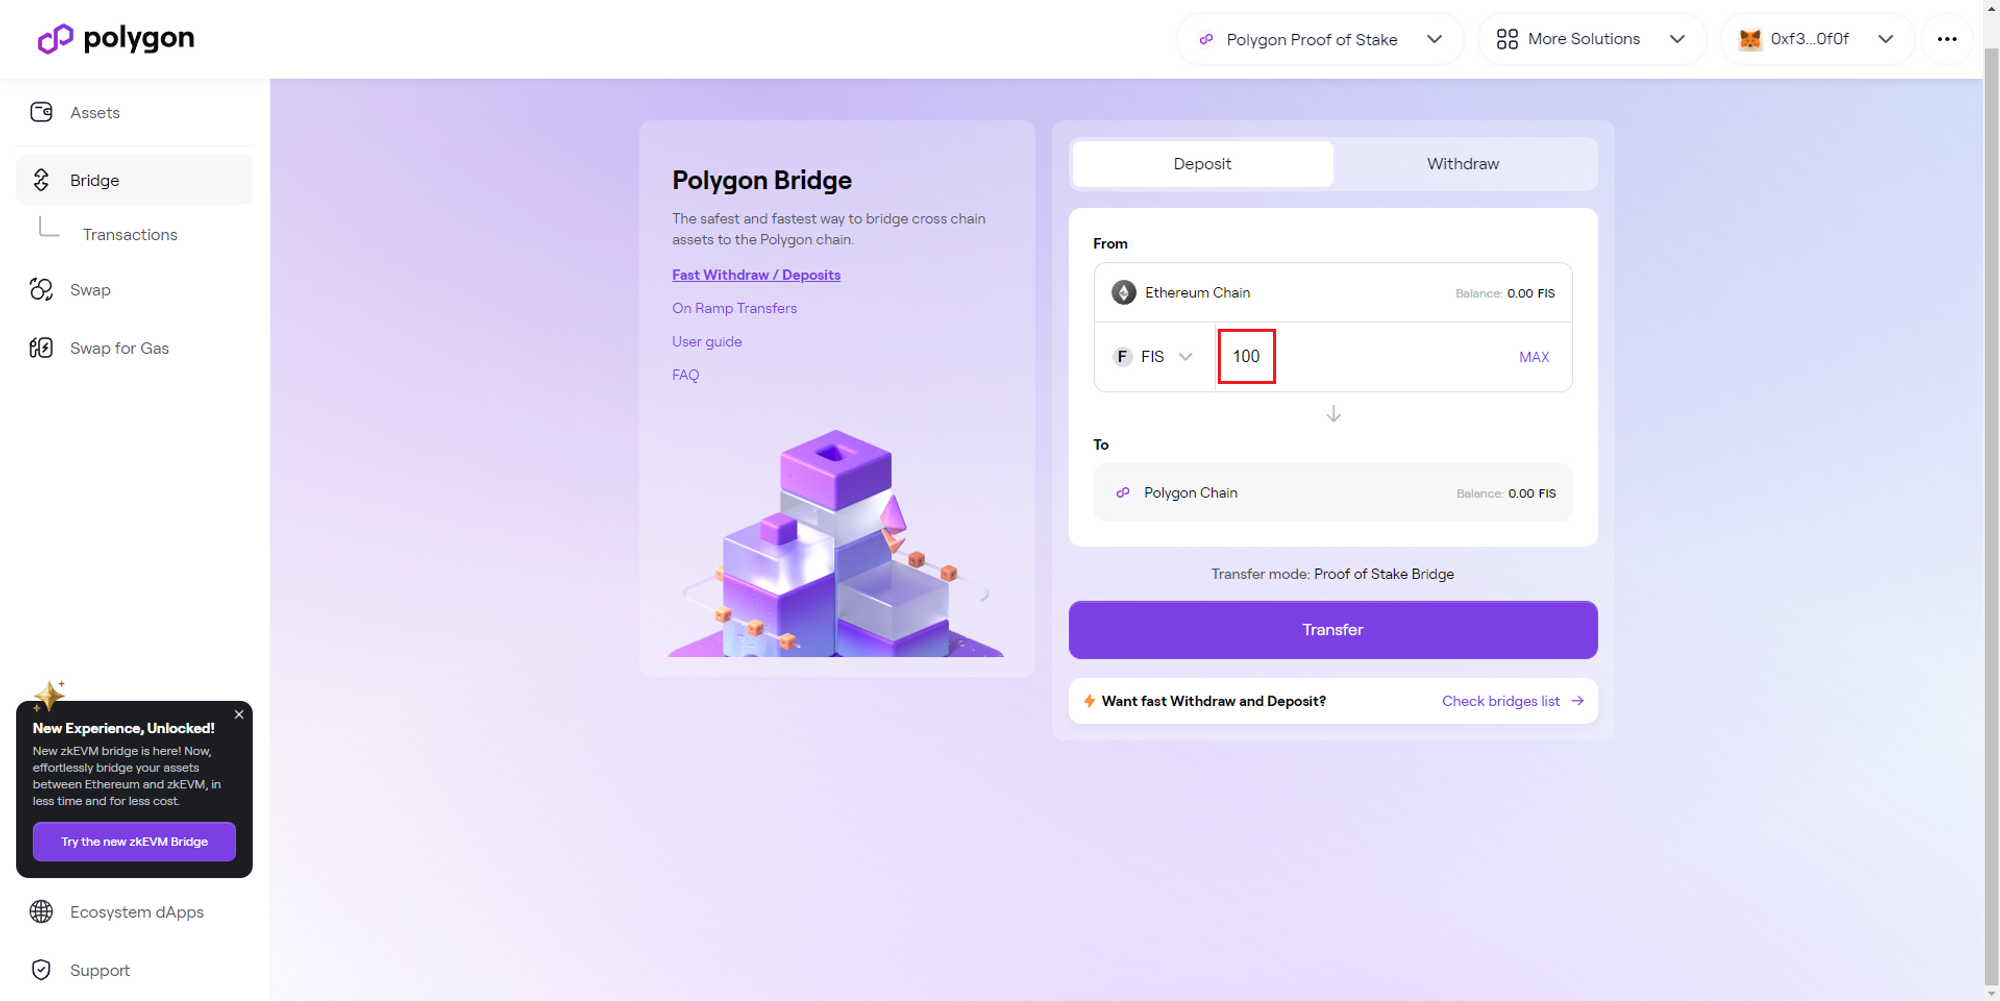
Initiate Transfer
Click "Transfer" to start the bridging process, locking your tokens on Ethereum and minting the equivalent on Polygon.
Confirm Transaction
Confirm the transaction in your web3 wallet. Ensure you have enough ETH for gas fees.
Switch to Polygon Network
In your wallet, switch to the Polygon network to view and use your bridged tokens.
Keplr IBC Transfer
Cosmos rToken and FIS bridge, we recommend using the IBC functionality of the Keplr wallet. StaFi Hub has been successfully integrated into the Keplr wallet. You can check the Kpler help doc (opens in a new tab).